
How to show customers what they’re leaving behind on page abandons
According to our research over 1/2 of carts are abandoned, and whilst Cart Abandon Triggered emails are great at re-engaging customers, what if we could prevent the abandon alltogether?
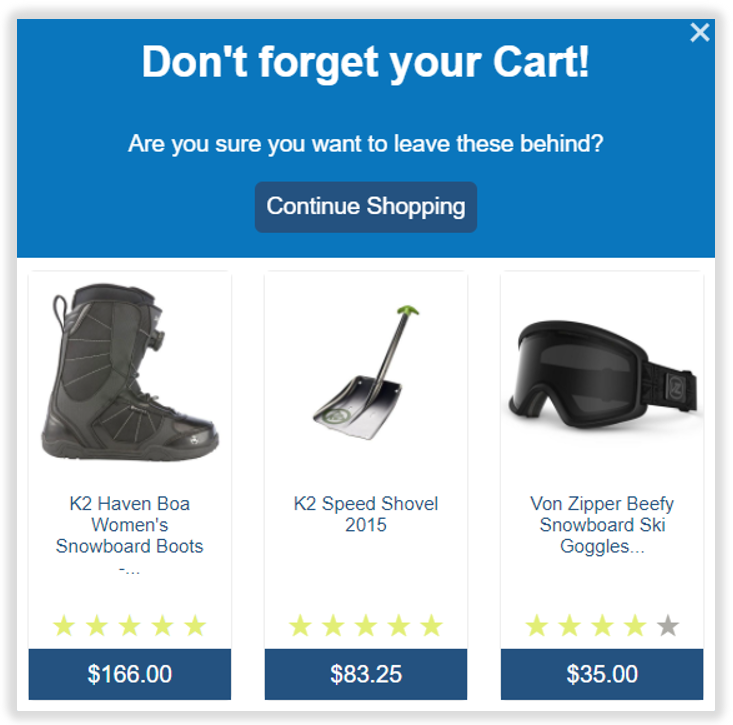
By using our templated Recommendation SmartBlocks, you are able to present visitors with their cart just as they start to abandon the page. Reminding customers about what they’re leaving, along with any applicable promotions, is a great way of re-engaging customers and moving them towards conversion.
Below will walk you through how to show customer their current cart, or other products the customer has carted in the past. Alternatively, you might want to show customers Similar Products to help them find the right products.
- You will need the Web Personalization module to implement this tactic
EXAMPLE
How to get started
Step 1 – Create Your Recommendations
Firstly let’s create your Recommendation Popover
- On the left hand nav, click Content | SmartBlocks
- On the Recommendation Tab, click Create SmartBlock
- Select the template Popover With Product Recommendations
Step 2 – Configure Look and Feel
On the Properties tab, configure name, tags and analytics tracking values.
On the Layout, Product Details and Carousel tabs, customise the look and feel of your popover. You can preview your SmartBlock at the bottom of the page.
If you have our Social Proof module, we highly recommend adding ratings and popularity messaging to encourage customers not to abandon. You can turn on Social Proof on the Options tab under Load Social Proof Data and customise the look and feel on the Ratings and Social Proof tabs
Step 3 – Configure Data Source
With this Data Source configuration, we can use our Personalized for one customer data sources, to show their recent history, starting with their currently carted items, down to their regularly browsed
- Click on the Data Sources Tab
- For the Primary Data Source select Current Cart (Dynamic)
- We recommend that the fallback is triggered if there are fewer than 1 products to display. This will ensure that even if a customer has only carted 1 item, that is what we will display
- For Fallback 1 Data Source select Most Recent Abandoned Cart (Dynamic) to draw from any previous abandonned cart
- For Fallback 2 Data Source select Frequently Carted (Dynamic) or Frequently Browsed (Dynamic) to draw from any previous carted / browse behavior
Step 4 – Configure popover on abandonment
- Go to the behavior tab
- Edit the Minimum Time Between pop-ups as appropriate. You could reduce to as little as 1 to popover on abandonment on each day that they might abandon.
- Ensure the box for Show on Exit Intent is ticked
- Edit the Popover Cookie Name to something unique e.g. abandonRecs.
Step 5 – Create Slot
- Click Publish and Use
- Select For Website Personalization
- Click on the Rules tab
- Under Person History drag the rule Has Carted into the rule tree
- In the User has carted dropdown select any product
- For the comparison field select at least
- In the Value column enter the number of products that a customer needs to have carted. This could be as little as 1, or you might only want to target larger cart abandonments
- Set the amount of time to be reviewed for carting behavior, for example the last 24 hours. You could either mimic your cart expirey timeframe, or use a longer time frame to also capture recent abandoners in addition to those with active carts*
- Drag your popover recommendations into the Yes path
- Add non-content, or an alternative popover for others abandoning the website. Perhaps consider showing an email signup form
* You may also want to consider further restricting the visitors who you want to target, for example:
- Those who have abandoned multiple times – combine the Sessions rule to identify those who have recently visited multiple times with the Has Purchased rule to say they’ve purchased no products
- Only target on certain pages with the Current Page rule, for example the cart page
Step 6 – Test & Deploy
To deploy via the Site Editor:
- Go to the Use tab
- Click on the Site Editor button
- Find the Slot created in Step 5 and drag and drop it into your website page.
Place the content in a location which appears on every page, such as the header or footer. Note that the popover will display in the center of the page regardless of Slot placement - Scroll down and click on Advanced
- In the Page Type dropdown, select All Pages
- Click Preview and ensure you meet your Slot criteria to see the popover in action.
- If you’re happy, go back to Slots | Site Editor and click Publish